Cosplay - Trafalgar Law Sword DIY Tutorial
February 09, 2017
As you all know, I am a HUGE One Piece fan. This series is definitely the greatest. I've introduced it to many of my friends who are now just as obsessed with it as I am haha. My first Kawaii Kon in 2015, I had to cosplay as a One Piece character. I chose the cute Ghost Princess Perona, and I will link that post once I write it.
For Kawaii Kon 2016, I decided I wanted to gender bend and cosplay one of my favorite male characters in One Piece, Trafalgar Law. I’ve been thinking about cosplaying him for quite some time because his outfit is simple but so cool (*fangirl*). I purchased his hooded shirt as well as his hat because I was too lazy to try make those. I was determined to make his beautiful sword.


Please enjoy this tutorial on how I made it!
These were the materials I used:
♡ Wood (2 in. x 1 in. x 8 ft.) – cut it from 8 ft. to 6 ft.
♡ Sanding block/ sponge
♡ Acrylic paint – black, gold
♡ Cardboard
♡ Foam sheet – white
♡ Glue gun
♡ Fleece fabric
♡ Red cord (x5)
♡ Purple ribbon (x2)

Day 1
Took a trip to Home Depot to buy a strip of wood (my friend said Poplar is light, but I just found this cheap strip.)
Went to Walmart to buy red cord, purple ribbon, ¼ sheet of fleece fabric, and gold paint.


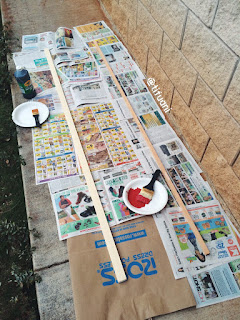
As soon as we got home, I started sanding the wood. I think I was sanding for one to two hours until I gave up. It was pretty smooth with lots of wood shavings to clean up.


I also started on the circular part of the swords handle. I just used cardboard lying around the house and I painted the circle gold on both sides.


Day 2
Painted the wood black (I think it takes about 20-30 mins to dry, so plan accordingly).
My friend was making the scythe of Tokyo Ghoul Suzuya Juuzou.

Then folded it on both sides 1 inch, then in half around the circle wrapping it and gluing it (if that makes any sense lol).


For Kawaii Kon 2016, I decided I wanted to gender bend and cosplay one of my favorite male characters in One Piece, Trafalgar Law. I’ve been thinking about cosplaying him for quite some time because his outfit is simple but so cool (*fangirl*). I purchased his hooded shirt as well as his hat because I was too lazy to try make those. I was determined to make his beautiful sword.


Please enjoy this tutorial on how I made it!
These were the materials I used:
♡ Wood (2 in. x 1 in. x 8 ft.) – cut it from 8 ft. to 6 ft.
♡ Sanding block/ sponge
♡ Acrylic paint – black, gold
♡ Cardboard
♡ Foam sheet – white
♡ Glue gun
♡ Fleece fabric
♡ Red cord (x5)
♡ Purple ribbon (x2)
Day 1
Took a trip to Home Depot to buy a strip of wood (my friend said Poplar is light, but I just found this cheap strip.)
 |
| You can't beat $1.18 for this whole piece! |
 |
| They can cut the size for you. |
Went to Walmart to buy red cord, purple ribbon, ¼ sheet of fleece fabric, and gold paint.


As soon as we got home, I started sanding the wood. I think I was sanding for one to two hours until I gave up. It was pretty smooth with lots of wood shavings to clean up.


 |
| You may want to use a protractor or tool for precision. |


Day 2
Painted the wood black (I think it takes about 20-30 mins to dry, so plan accordingly).
My friend was making the scythe of Tokyo Ghoul Suzuya Juuzou.


I cut out the fleece fabric into 4 ½ inches, depending how thick you want it around your circle.


Day 3
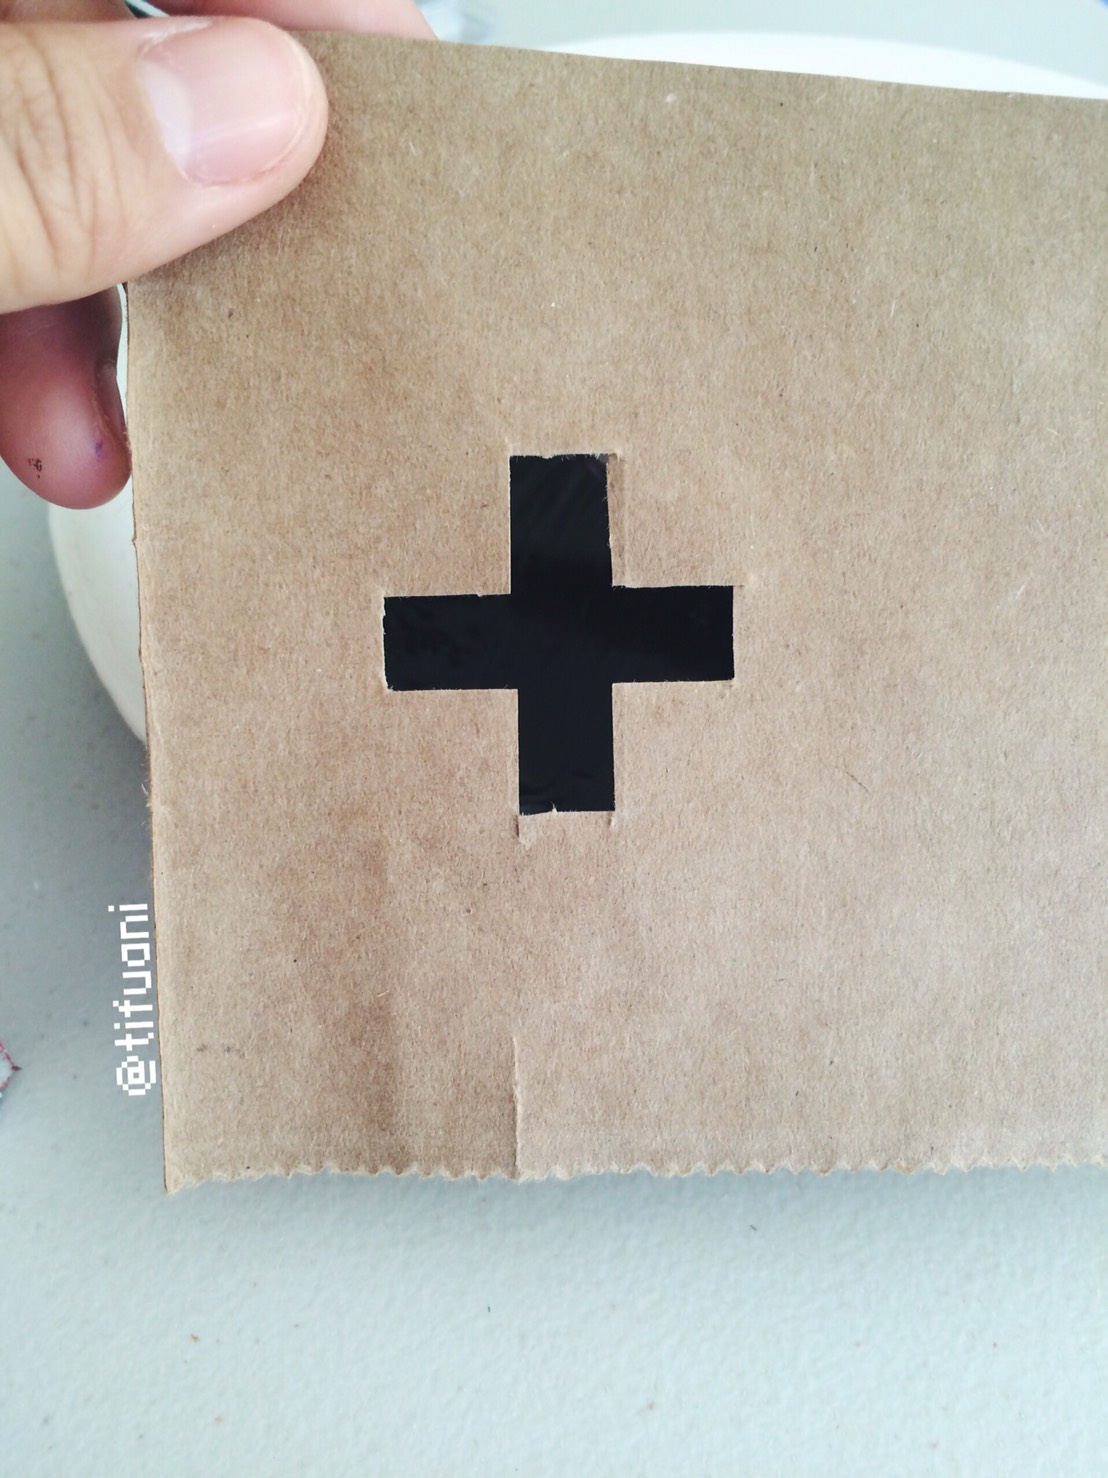
Time to paint the crosses! I made two stencils, one out of cardboard, but that was a FAIL LOL and the other from a brown shopping bag, which was too thin.

 |
| What am I doing.... |
 |
| I really wanted the crosses to be perfect. |
I took a break and decided to paint the ends of the wood gold. I used blue tape for precision.
 |
| The red outline is what the blue tape looked like. |
 |
| You can see the messed up white crosses painted over (going to cover that with foam crosses). |

After painting the gold ends, I decided to work on the swords hilt with the purple ribbon. I found a Youtube tutorial on how to do that, called “tsuka maki”. It is basically a bunch of twisting and turning.


Not as hard as it looks, but if you are having difficulty, an easy alternative is to criss-cross and overlap the ribbon to get the diamond spaces effect.
Day 4
After a stressful day going to Walmart twice due to needing to improvise on my crosses, I am finally drawing them out on the foam sheet.

 |
| I am spacing them out on my sword and using a glue gun to glue it to the wood. |
 |
| I also started wrapping the cord to see how many crosses I needed. |

 |
| Final product! |
 |
| Drew on his tattoos with a thick eyeliner pen! |
 |
| My friend with her Suzuya Juuzou scyth & me~ ☺ |


0 ♡